Quickstart
Create beautiful, scalable documentation portals in minutes.

Getting Started
Welcome to the WriteDocs documentation guide. Follow the instructions below to learn how to create, deploy, and take your documentation to the highest level with WriteDocs.
Requirements
WriteDocs uses GitHub to integrate your docs with your code, and make source control effortless. Therefore, make sure you have the following requirements checked before getting started:
- GitHub account
- GitHub organization
- Code editor, such as Visual Studio Code.
Step 1: Create a repository from the WriteDocs template on GitHub
Start by creating a new repository in your GitHub organization using the WriteDocs Template provided on GitHub. When creating the repository, use the [yourcompanyname]-docs standard to define the repository name. This will give you a structured starting point to build your documentation quickly.
Step 2: Connect your repository to the WriteDocs app
Once your documentation repository is created, follow the steps below to connect the WriteDocs App to this repository. This connection ensures that WriteDocs automatically generates and deploys your documentation.
- Access the WriteDocs App on GitHub.
- Click Install.
- Select Only select repositories and look for the documentation repository created in Step 1.
With these simple steps, WriteDocs will automatically deploy your documentation.
WriteDocs don't recommend changing the repository name, but if you need to update it, contact our support at WriteDocs Slack Community before updating it, so we can properly configure this update on our side.
Step 3: Access your documentation
Initially, your documentation will be available at the docs.writedocs.io domain. To access your docs, follow the example below:
| Repository name | Documentation URL |
|---|---|
myCompany-docs | myCompany.docs.writedocs.io |
docs-myCompany | myCompany.docs.writedocs.io |
If you are in the Pro plan, you can add a custom domain to your documentation. For additional information, open a thread at the #support channel in the WriteDocs Slack Community and our team will be happy to help you set up your custom domain.
Step 4: Customize your documentation (config.json)
WriteDocs provides you with a config.json file in your documentation repository where you can quickly customize the appearance and structure of your documentation. You can find more information about setting up this file on the Global Settings page.
Step 5: Update your documentation
When you push changes to the main branch, WriteDocs will automatically update and deploy your documentation.
If you don't have much experience in contributing to GitHub projects or using a doc-as-code approach, you can check our Beginners Guide that covers the basics of working with Git and using a code editor to create docs.
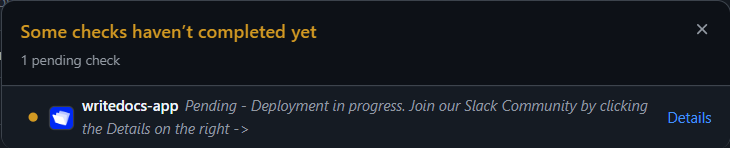
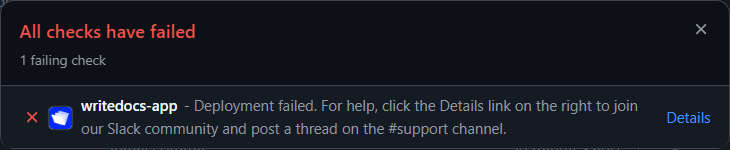
Whenever a new push is commited to your main branch, WriteDocs will keep you informed of the deployment state of your updates. You can keep track of this in your repository's main page, like exemplified in the video below:
WriteDocs will keep you posted of the following situations:
- Pending: Your new deployment is currently under way.
- Failed/Error: Something went wrong. If you need assistance contact our support in slack by clicking the Details link at the right side.
- Success: Your deploy is ready! Access it by clicking the Details link at the right side.
