Crowdin
You can use Crowdin to translate your documentation pages. This guide will help you setting up Crowdin with Github Integration, allowing you to automate the translation and page creation process.
Step 1: Create a Project in Crowdin
When first creating a new project, you need to set the following:
- Project Name: The name of the project in Crowdin.
- Source Language: The source language of the new project.
- Target Languages: The languages you want your project translated to.
- Github Integration: Integrate your Github repository into Crowdin.
After setting these, click on Create Project.
Step 2: Github Integration
If you selected the Github Integration in Step 1, you'll be redirected to the Integrations tab, to set up your Github integration. Follow the process below to set it up:
- Click Set Up Integration and select the Source and translation files mode option.
- Authorize Crowdin to access your organization's repositories.
- Select which repository you want to connect Crowdin, and select the branch main for translation.
Crowdin offers other configurations, such as whether to automatically translate files, and sync schedule. You can select what you prefer here.
- Click Save.
Step 3: Branch Configuration
Now, you need to set some branch configurations so Crowdin knows where to find source files, and where to place the new translated ones.
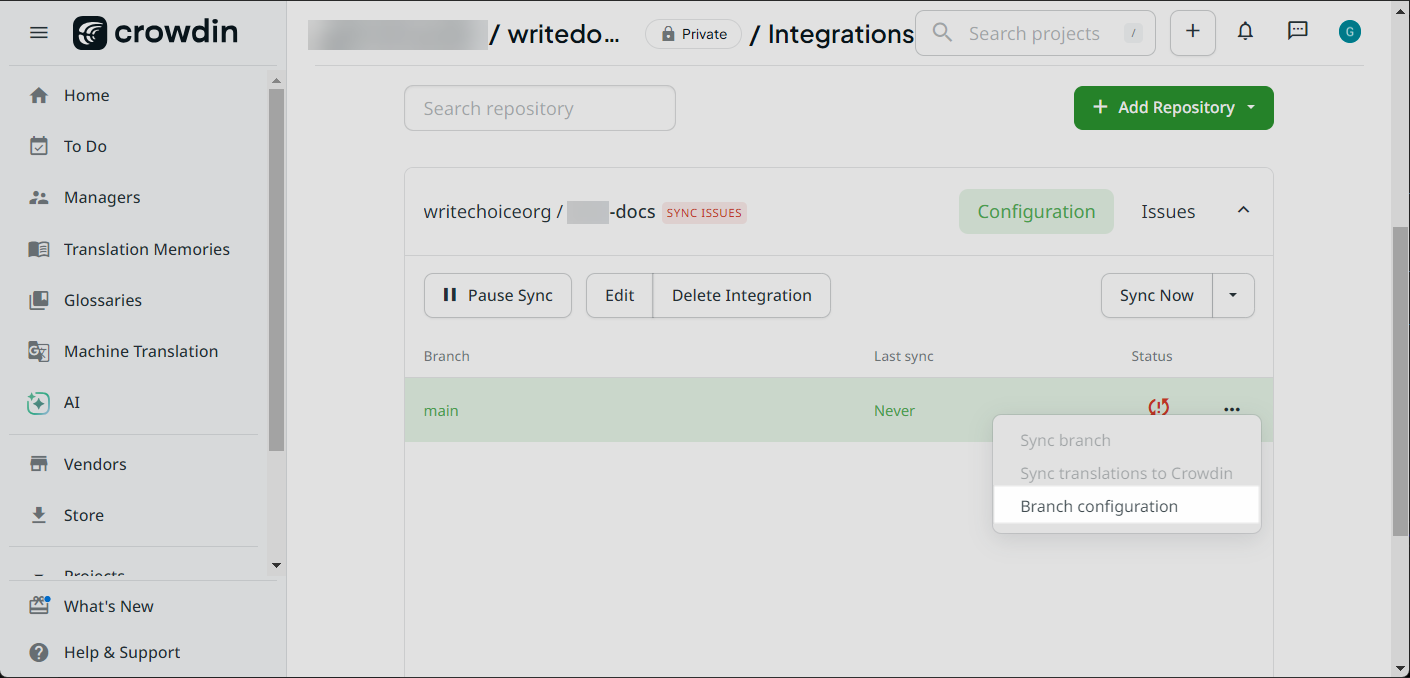
- First, click on the 3 dots icon at the main branch listed on the screen, and select the Branch Configuration option.

- Set the configuration file as crowdin.yml, and click Continue.
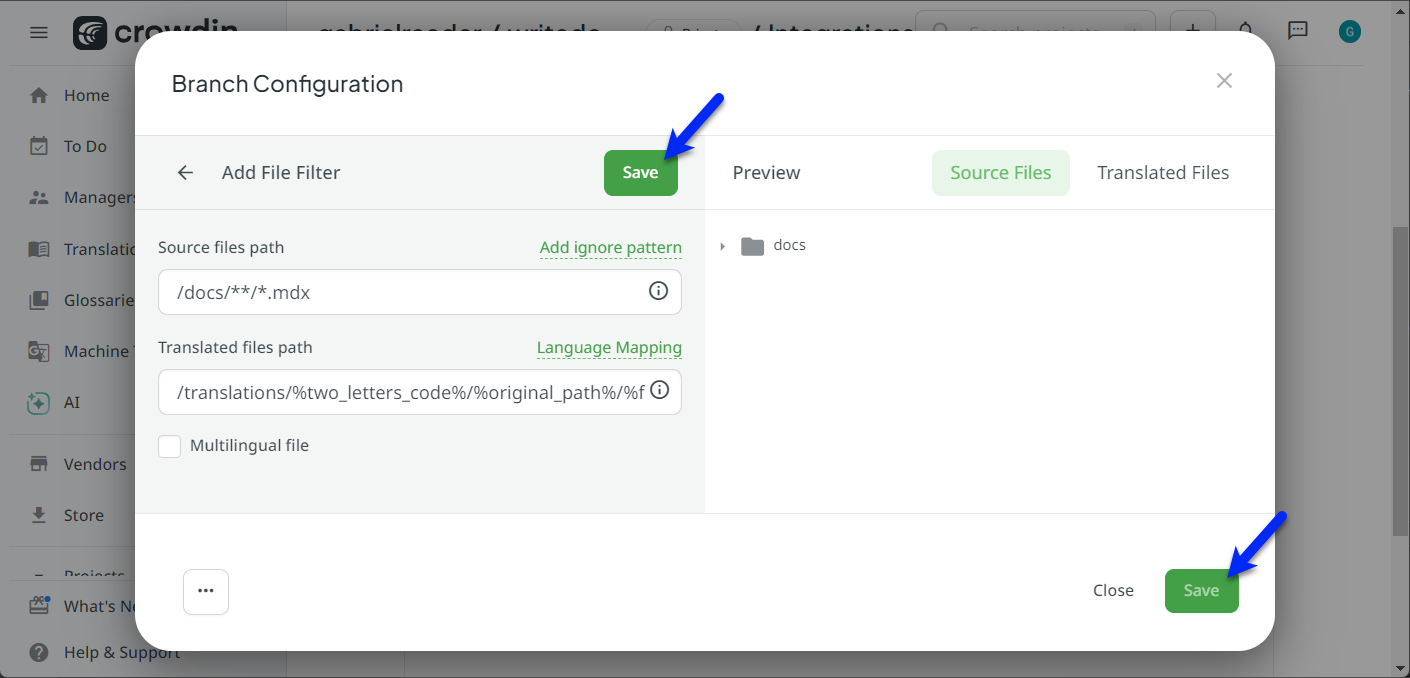
- Now, you need to define the source and translated files path. Below you find each pattern you need to use for each option:
- Source files path: It needs to point to all
mdxfiles inside the docs folder.
/docs/**/*.mdx
- Translated files path: It uses placeholders, as instructed by Crowdin, to point to the correct WriteDocs file organization for translated files.
/translations/%two_letters_code%/%original_path%/%file_name%.%file_extension%
- Now, click Save twice, once at the top, to save the filter, and than at the bottom-right to save the branch configurations.

Once this is done, your repository will be connected to Crowdin, and it will replicate all files inside the docs folder to be translated.
Step 4: Using Crowdin Translations
Crowdin will generate a Pull Request on your repository with the translated files. To send it to WriteDocs, you need to merge this content into your main branch. With this, and WriteDocs config.json correctly configured, your new translations will be available at your documentation.